[Share] How to : Revert back your Zenfone 5 From Marshmallow to Lollipop [ENG]

[Share] How to : Revert back your Zenfone 5 From Marshmallow to Lollipop [ENG]

So, after a while playing around with the Marshmallow build things i think i miss a lot of Zenfone 5 stock features like ZenUI and Splendid (that app is cool btw, but isn't supported on custom rom). I'm pretty sure that you guys feel the same way too and want to know the easiest steps to get your device back to stock ROM even if you didn't take any backup before. This ROM is cleaned (debloated) from unnecessesary stuff and added few tweaks on the build.prop so the device will perform better even from real custom rom. Note that for installation you need the unlocked bootloader and Intel USB Driver is properly installed on your computer.


Installation :

  • Download the recovery image, adb files, ROM and GApps
  • Copy the ROM and GApps to SD Card along with the optional installation packages
  • Copy your files that you want to backed up because we are going to do a clean install
  • Reboot your device to droidboot (fastboot) mode [ power + vol. up]
  • Put recovery image inside adb folder
  • Clean the device using command "fastboot erase system"; "fastboot erase data" and "fastboot erase cache"
  • Flash the recovery using following command : "fastboot flash recovery Recovery.img"
  • Reboot to recovery : "fastboot reboot-bootloader"
  • Mount manually every partition
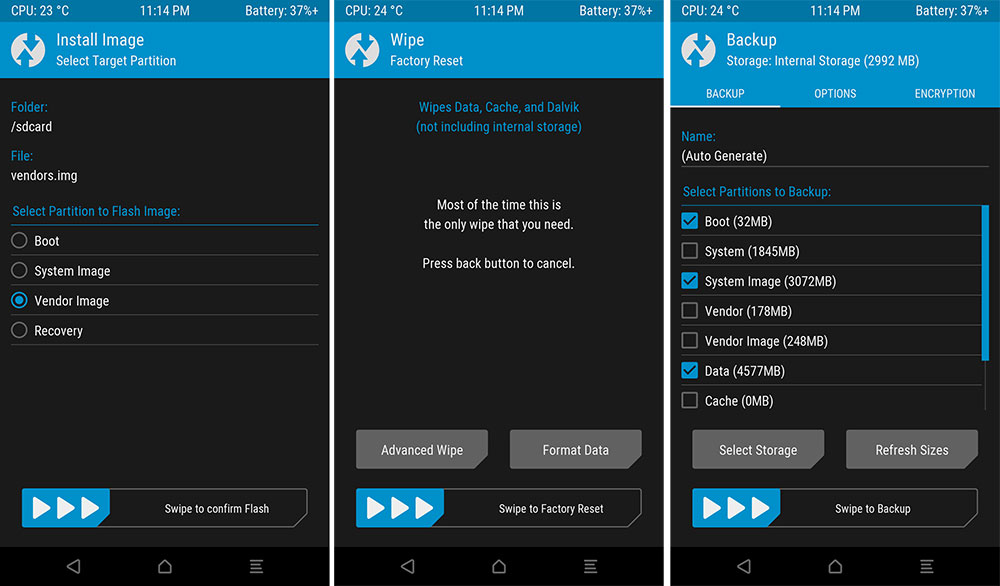
  • Once again wipe everything except SD Card
  • Install the ROM, clear cache
  • Install GApps, clear cache
  • Install SuperSU, clear cache
  • Install optional packages (Xposed, V4A), don't forget to clear cache after installing any zips
  • Once it booted up to system, open ASUS Autostart Manager and allow SuperSU to autostart at boot
  • Open SuperSU and disable "mount namespace separation"
There you go you just reverted back to optimized stock ROM and everything should work normally like it should to be...

Downloads :
Credit goes to :
XDA Member prathmesh pande

Thank You~

Nb : Indonesian tutorial will be released soon / Tutorial bahasa Indonesia akan dipost secepatnya
[Share] Marshmallow Fixed Kernel for Zenfone 5 (CM13 / CM13 Based ROMs) / Kernel Fix Zenfone 5 Marshmallow

[Share] Marshmallow Fixed Kernel for Zenfone 5 (CM13 / CM13 Based ROMs) / Kernel Fix Zenfone 5 Marshmallow

Have ever experiencing any battery drain or some lockscreen bug on Android Marshmallow based ROM on Zenfone 5 devices ? I've got this...
So, today i'll share the kernel that fix battery drain issue and some lockscreen bug, you just need to flash it from fastboot (droidboot) mode using certain command (don't worry i'll include it in this post). Before flashing make sure Intel USB Driver is installed correctly. This kernel only support CM13.1 and other ROM based from CM 13/13.1 (like RR, XOSP, BlissRom, etc...)

Installation :


  • Unpack the zip file
  • Put image file inside adb folder
  • Make sure adb debugging is on
  • Reboot your phone to droidboot mode by pressing power + vol. up button while the phone is off
  • Connect your phone to your computer through USB cable
  • Press shift + right click inside adb folder and select "Open command window here"
  • Check if your phone is detected by your computer by using command "fastboot devices" then it should be displaying 1 device with some kind of serial number, if not reinstall the Intel USB Driver and make sure it installed correctly
  • Begin flash the kernel by typing "fastboot flash boot bootCM-13.1-20160504.img"
  • Reboot by using command "fastboot reboot"
=====================================================================

Pernah ngalamin battery drain atau bug di lockscreen sewaktu pakai ROM Marshmallow di Zenfone 5 ? Tenang XD
Jadi, hari ini admin akan ngeshare kernel yang (mungkin) bisa fix battery drain sama bug lockscreen itu. Cara flashnya gampang cukup diflash lewat fastboot (droidboot) mode dengan command yang akan admin cantumkan nantinya. Sebelum flashing pastikan Intel USB driver sudah diinstall dengan benar. Kernel ini hanya support untuk CM 13 atau ROM yang berbasis CM 13/13.1 (RR, XOSP, BlissRom, dsb...)

Instalasi :
  • Extrak zip
  • Taruh file .img di dalam folder adb
  • Pastikan adb debugging sudah on
  • Reboot ke droidboot mode dengan menekan power + vol. up saat handheld mati
  • Sambungkan handheld ke PC lewat kabel USB
  • Tahan shift sambil tekan klik kanan di dalam folder adb, lalu pilih opsi "Open command window here"
  • Cek apa handheld tersambung ke komputer dengan command "fastboot devices" lalu akan muncul 1 device dengan diikuti semacam nomer seri, kalau enggak install ulang Intel USB Driver.
  • Mulai flash kernel dengan command "fastboot flash boot bootCM-13.1-20160504.img"
  • Reboot dengan command "fastboot reboot"
Download :
Credit to :
XDA Senior Member dgadelha

Thank You~
[Updated 03-06-2016] [Share] Viper4Android for Marshmallow based ROM (x86 only)

[Updated 03-06-2016] [Share] Viper4Android for Marshmallow based ROM (x86 only)

Anyone wonder why it's always failing to install Viper4Android on Zenfone 5 with Marshmallow based ROM loaded up ? The simple answer, it's because the SElinux is disabled by default and the ROM will be failing to boot if the SElinux is turned on. But, there's a single kernel developed by a developer to make SElinux works and it turns on the phone but still, it's buggy enough because the second SIM is dead if you apply this kernel.
So, probably everyone should be asking "Then how i could install this audio mod for my device ?"
Well, my friend you came to the right place...
I will share to you the flashable zip made by someone at XDA that could used to install V4A without risking anything with kernel and all of this SElinux things. Because it's a flashable, of course you have to unlock the bootloader and install custom recovery on your phone (TWRP preferred). Oh, and if you are the huge fan of Sony's music player app (also known as walkman) this flashable zip is including latest beta version of walkman beside the V4A itself.

Installation :
  • Download the files
  • Reboot to recovery
  • Take a backup
  • Flash it through recovery
  • Reboot to system
*Note : I'll include the uninstaller so you could uninstall it if something goes wrong to your device after flashing this mod, just as installation flash the uninstaller on recovery.


===============================================================

Pernah gak sih kepo kepo kenapa Zenfone 5 yang udah cusrom MM gak bisa install Viper4Android ? Gampangnya, karena SElinux-nya gak dinyalain sama developernya padahal V4A butuh SElinux On buat berjalan, tapi kalo dinyalain bootloop deh. Ada sih kernel dari developer yang ditujukan buat nyalain SElinux, tapi kalo pake kernel itu SIM 2 jadi mati deh.
"DUH, jadi gimana cara installnya ? :'("
Tenang aja gaaan :D
Admin bakal share satu flashable zip yang bisa untuk install V4A tanpa ganti ganti kernel dan SElinux. Karena bentuknya flashable zip, yang jelas handheld udah harus unlocked bootloader dan punya custom recovery (lebih baik TWRP). Oh iya, kalo kalian suka sama Music Player-nya buatan Sony (Walkman) di flashable ini juga disertakan loh disamping V4Anya sendiri :)

Instalasi :
  • Download file filenya
  • Reboot ke recovery
  • Nandroid backup
  • Flash file lewat recovery
  • Reboot ke system
Nb : Admin bakal nyertain uninstallernya juga kalau kalau ada yang handheldnya error sehabis install mod ini, sama seperti install flash aja lewat recovery.

Download :
Viper4Android : Here
Uninstaller : Here

TWRP tutorial : Here

Thanks to :
XDA Senior member milano88

Thank you~
[Updated 6-06-16] [Share] Xposed for Android Marsmallow (6.x) / Xposed untuk Android Marshmallow (6.x)

[Updated 6-06-16] [Share] Xposed for Android Marsmallow (6.x) / Xposed untuk Android Marshmallow (6.x)

Hey, so back again with me :)
You know Xposed right ? You should know it if you actually likes to customize your phone by changing the ROM etc.
But, i saw some people on internet have some difficulty to install it, especially after the latest Android version is rolled and many ROM is based on the newest Android version. Yes that is android Marshmallow, but don't worry folks i will share the links and original thread link on XDA so you guys don't have to confuse about installing Xposed for 6.x again. All you need is Android Marshmallow (6.x) device, unlocked bootloader, and a custom recovery like CWM or TWRP.

Installation :

  • Just flash it via custom recovery
  • Install the Xposed Module Installer (the apk file)
  • There's an uninstaller too in case something is going wrong after installing this thing, same like installation just flash the uninstaller through recovery
====================================================

Halo, balik lagi sama admin :)
Kalian tau Xposed kan ? Kalian harusnya tau kalau kalian suka gonta ganti ROM sampe mabuk di handheld kalian sendiri XD trus nambahin fiturnya lewat Xposed ini :)
Tapi kalo admin liat masih banyak orang di internet kesulitan buat installnya, terutama setelah update Android yang paling baru keluar dan versi Android di upgrade di beberapa device. Iya, memang yang admin maksud Android Marshmallow (6.x), tapi jangan khawatir admin akan share Xposednya sekaligus link asli ke thread di XDAnya, jadi gak bakalan ada yang bingung lagi deh :). Yang dibutuhkan yaitu HH Android yang punya versi Android 6.x, unlocked bootloader, dan custom recovery seperti CWM atau TWRP.

Instalasi :
  • Flash aja seperti biasa lewat custom recovery
  • Install Xposed Module Installer (file apk-nya)
  • Ada juga uninstallernya kalau kalau HH kamu error sehabis install Xposed-nya, sama seperti install flash aja file uninstallernya lewat custom recovery


Download :
1. arm :
2. arm64 :
3. x86 :
4. Xposed Module Installer : Here

Link to original thread / link ke thread asli : Here
Thanks to : XDA Senior Recognized Developer rovo89

Thank You~
Terima Kasih~

[Share] File Manager Paling Lengkap Untuk Android [Updated 27-03-2017]

Halo, semua :)
Pernah kepikiran file manager yang fiturnya lengkap ada bal balnya XD buat ngatur file file di Android kamu ?
Kamu dateng ke tempat yang pas nih XD
Kenalin, file manager yang paling gampang dipakai, fiturnya lengkap ada bal balnya XD, yang ratingnya paling tinggi di Google Play sejak versi pertamanya,, namanya ES File Explorer.
Udahlah basa basinya, nih liat aja deskripsinya biar langsung tau kehebatannya XD 


Ini adalah versi Pro dari ES File Explorer (File Manager)aplikasi yang harus dimiliki untuk setiap pengguna Android.
Anda dapat menikmati semua manfaat di bawah ini setelah Anda memiliki ES File Explorer Pro!
✔ Hilangkan iklan - Bersihkan semua iklan di App
✔ Penyesuaian lebih - Set awal halaman & SEMUA default windows
✔ Lebih banyak yang dilihat - Tema Baru dan panel warna
✔ Lebih banyak yang diharapkan - Puluhan fitur baru (benar-benar gratis) akan segera datang

Highlights dari ES File Explorer (File Manager):
★ File Manager: Klik untuk menginstal aplikasi, dan memeriksa file zip
★ Multimedia Explorer: Klik untuk memutar musik / video, gambar, dan dokumen
★ Cloud Storage: Mendukung Dropbox, Box.net, SugarSync, Google Drive, onedrive (SkyDrive), Amazon S3, Yandex dan lebih banyak platform cloud.

Fitur dan Manfaat ES File Explorer (File Manager):
File Manager: Mengelola file Anda seperti yang Anda lakukan pada desktop atau laptop menggunakan Beberapa Select, Cut / Copy / Paste, Move, Buat, Hapus, Ubah nama, Cari, Share, Kirim, Sembunyikan, Create Shortcut, dan Bookmark. Semua operasi dapat dilakukan pada file lokal (pada perangkat Android Anda) atau bahkan jauh (dari komputer Anda melalui jaringan)
Application Manager: Kategorikan, uninstall, kembali, dan membuat cara pintas ke aplikasi Anda
Remote File Manager: Ketika fitur ini diaktifkan, Anda dapat mengelola file di ponsel Anda dari komputer Anda
Built-in ZIP dan dukungan RAR: Memungkinkan Anda untuk kompres dan dekompresi file ZIP, file RAR membongkar, dan menciptakan dienkripsi (AES 256 bit) file ZIP
Built-in player dan pemain untuk berbagai jenis file: Termasuk foto, musik, dan video; mendukung aplikasi pihak ketiga seperti Quick Office untuk produktivitas yang lebih baik
Shows thumbnail: Untuk APK dan gambar
pelihat ►Text dan editor
Access PC rumah Anda: Melalui smartphone Anda melalui WiFi dengan SMB
Functions sebagai FTP dan WebDAV client: Mengelola file pada FTP, FTPS, SFTP, dan server WebDAV seperti Anda mengelola file pada kartu SD Anda
Bluetooth browser file: Anda dapat copy dan paste file antara perangkat Bluetooth-siap. ES File Explorer (File Manager) mendukung OBEX FTP untuk browsing perangkat dan mentransfer file antara perangkat Bluetooth
tugas ►Kill dengan satu klik, meningkatkan memori dan mempercepat perangkat Anda: Termasuk widget sederhana yang tetap pada layar rumah Anda untuk membiarkan Anda tahu situasi RAM Anda saat ini dan secara otomatis membunuh tugas, dengan daftar abaikan untuk mengabaikan aplikasi yang ingin Anda tetap berlari. Modul Task Manager diperlukan untuk fitur ini.
Cache Cleaner dan Auto-start Manager: Hapus file sampah yang mengambil ruang penyimpanan yang berharga. Modul Task Manager diperlukan untuk fitur ini.
Root Explorer: Set utama dari alat manajemen file untuk pengguna root. Menyediakan akses ke seluruh sistem file dan semua direktori data, dan memungkinkan pengguna untuk mengubah izin.
Supports Beberapa Bahasa: Inggris, Rusia, Jepang, Korea, Perancis, Spanyol, Jerman, Italia, Ceko, Hungaria, Ukraina, Tamil, Catalan, Turki, Lithuania, Portugal dan lebih ...

Pertanyaan yang Sering Diajukan (FAQ):
1. Klik di-app "menu-pengaturan-bantuan" untuk melihat Pengguna Pedoman untuk beberapa pertanyaan yang paling sering ditanyakan


Informasi tambahan:
1. Android 1,5-2,1 pengguna, gunakan ES File Explorer Cupcake (https://play.google.com/store/apps/details?id=com.estrongs.android.pop.cupcake).
2. Anda dapat men-download tema klasik di Google Play (https://play.google.com/store/apps/details?id=com.estrongs.android.pop.classic).


Apa yang baru
  1. ES File Explorer Pro 1.0.4
  2. Tambahkan BATAL fitur SYNC TO CLOUD
  3. Menonaktifkan auto-sync jika path sumber tidak ada
  4. bugs dipernaiki

App bisa di download disini

Terima Kasih~

[Share] Most Powerful and Useful File Manager on Android [Updated 27-03-2017]

So, hey folks :)
Have you ever wondered the file manager that powerful enough to managing the files on your android ?
Well, you came to the correct place XD
I'm introducing to you the most easy-to-use powerful file manager that rocks Google Play Store stars since it's first version, the name is ES File Explorer.
Well, enough the chit chat,, i will leave the description so you could know the things that this app could do :)


This is the Pro version of ES File Explorer (File Manager) - the must-have app for every Android user.
You can enjoy all the benefits below once you own ES File Explorer Pro!
✔ Remove Ads - Clean up all Ads in the App
✔ More to customize - Set start pages & ALL default windows
✔ More to see - New Theme and color panel
✔ More to expect - Dozens of new features( totally free) will come soon

Highlights of ES File Explorer (File Manager):
★ File Manager: Click to install applications, and check zipped files
★ Multimedia Explorer: Click to play music/videos, check image(s) and document(s)
★ Cloud Storage: Supports Dropbox, Box.net, Sugarsync, Google Drive, OneDrive(SkyDrive), Amazon S3, Yandex and more clouds platforms.

Features and Benefits of ES File Explorer (File Manager):
File Manager: Manage your files just like you do on your desktop or laptop using Multiple Select, Cut/Copy/Paste, Move, Create, Delete, Rename, Search, Share, Send, Hide, Create Shortcut, and Bookmark. All operations can be performed on local files (on your Android device) or even remotely (from your computer over a network)
Application Manager: Categorize, uninstall, back up, and create shortcuts to your apps
Remote File Manager: When this feature is enabled, you can manage files on your phone from your computer
Built-in ZIP and RAR support: Allows you to compress and decompress ZIP files, unpack RAR files, and create encrypted (AES 256 bit) ZIP files
Built-in viewers and players for various file types: Including photos, music, and videos; supports third-party applications such as Quick Office for better productivity
Shows thumbnails: For APKs and images
►Text viewers and editors
Access your home PC: Through your smartphone via WiFi with SMB
Functions as an FTP and WebDAV client: Manage files on FTP, FTPS, SFTP, and WebDAV servers just like you manage files on your SD card
Bluetooth file browser: You can copy and paste files between Bluetooth-ready devices. ES File Explorer (File Manager) supports OBEX FTP for browsing devices and transferring files between Bluetooth devices
Kill tasks with a single click, increase memory and speed up your device: Includes a simple widget that stays on your home screen to let you know your current RAM situation and automatically kill tasks, with an ignore list to ignore the applications you want to keep running. The Task Manager module is required for this feature.
Cache Cleaner and Auto-start Manager: Delete junk files that take up valuable storage space. The Task Manager module is required for this feature.
Root Explorer: The ultimate set of file management tools for root users. Provides access to the entire file system and all data directories, and allows the user to change permissions.
Supports Multiple Languages: English, Russian, Japanese, Korean, French, Spanish, German, Italian, Czech, Hungarian, Ukrainian, Tamil, Catalan, Turkish, Lithuanian, Portuguese and more...

Frequently Asked Questions (FAQs)
1. Click the in-app “menu-setting-help” to view the User’s Guidebook for some of the most frequently asked questions 


Additional Information
1. Android 1.5 - 2.1 users, please use ES File Explorer Cupcake (https://play.google.com/store/apps/details?id=com.estrongs.android.pop.cupcake).
2. You can download the Classic Theme on Google Play (https://play.google.com/store/apps/details?id=com.estrongs.android.pop.classic).


What's New
ES File Explorer Pro 1.0.4
  1. Add CANCEL SYNC TO CLOUD feature
  2. Disable auto-sync if source path does not exist
  3. Bugs fixed
You could download it Here

Thank You~

How To : Install TWRP Custom Recovery 3.0.2-0 on Zenfone 5 (T00F)

How To : Install TWRP Custom Recovery 3.0.2-0 on Zenfone 5 (T00F)

Hai balik lagi, jadi admin sudah menshare cara Install ROM RRMM pada Zenfone 5. Nah salah satu syarat installnya adalah memiliki TWRP.
Jadi admin kali ini akan menshare cara install TWRP 3.0.2-0 untuk Zenfone 5 (T00F) dengan baik dan benar XD


TWRP 3.0.2-0 : Here
ADB : Here
Intel USB driver : Here

Syarat : 
- Unlocked bootloader
- USB Debugging "ON"
- Intel USB Driver sudah terinstall di PC
- Punya sedikit pengetahuan tentang penggunaan ADB

Instalasi :


  • Download kedua file diatas
  • Ekstrak ADB
  • Masukkan file image TWRP ke folder ADB
  • Matikan handheld
  • Masuk ke mode fastboot (droidboot) dengan cara menekan tombol power dan vol. up bersamaan hingga logo ASUS muncul
  • Setelah masuk di droidboot, sambungkan handheld ke PC dengan kabel USB
  • Di dalam folder ADB, tahan shift sambil klik kanan di mana saja
  • Pilih opsi "Open Command Window Here"
  • Untuk mengecek status, ketik command "fastboot devices" kalau handheld terdeteksi maka akan muncul nomer seri dan angka angka, kalau tidak terdeteksi maka akan kosong, fix : install ulang Intel USB Driver
  • Jika terdeteksi, ketik command "fastboot flash recovery recovery.img" untuk memflash TWRP
  • Reboot

Selamat, TWRP 3.0.2-0 telah sukses terinstal di Zenfone 5 anda. Untuk mengakses TWRP dalam keadaan mati tahan tombol power dan vol. down.

Update : Here

  • Untuk update silahkan download file diatas lalu flash lewat TWRP yang sudah terpasang

Credit goes to :
XDA Senior Member X AnwarMov

Terima kasih~
[Updated 06-06-2016] Custom ROM Ressurection Remix Marshmallow (6.x) for Zenfone 5 (T00F)

[Updated 06-06-2016] Custom ROM Ressurection Remix Marshmallow (6.x) for Zenfone 5 (T00F)

Hi, lama gak update nih hehe XD
Jadi post kali ini akan sedikit beda karena admin ingin sharing tentang hal hal yang berbau teknologi B)

Jadi, kalian tau Android kan ? Android adalah sistem operasi besutan Google yang paling terkenal di dunia dan sekarang ini versi official-nya telah mencapai versi 6.x (Marshmallow) dan android N untuk technical previewnya. Jadi device yang admin miliki saat ini adalah Zenfone 5 (T00F) dan mengejutkannya lagi ternyata device kita ini telah support untuk menjalankan Android 6.x (MM). Walaupun bukan official dari ASUS dan disupport oleh developer lain, tetapi ROMnya sendiri adalah ROM yang terkenal karena telah di port di banyak device, selain itu device kita ini telah disupport secara official oleh team dari ROMnya. Nama ROMnya adalah Resurrection Remix, versi buildnya 5.6.8 [6.0.1r43]. Basisnya adalah ROM Cyanogenmod.


Yuk ah daripada kelamaan nih admin bagikan link untuk download ROMnya : Here / Here

GApps (Untuk install layanan Google) : Here (Pilih x86>6.0>Pico>Download)


Bug list :


  • GPS gak berfungsi; fix : Pakai A-GPS
  • FM Radio gak berfungsi; fix : install TuneIn Radio


Note :


  • Handheld harus sudah dalam keadaan unlocked bootloader
  • Handheld sudah punya TWRP, HARUS TWRP jika menggunakan CWM kemungkinan akan gagal (Tested) > tutorial Here
  • DWYOR


Fitur :


  • Based On Latest Google Android 6.0.1 Release
  • Based On Cyanogenmod 13 Sources
RR Customizations : 
  • Navigation Bar
  • Enable/Disable Navbar
  • Navbar Button Customization
  • Navbar Slim Dim 
  • Animate Dim
  • Dim Timeout Duration
  • Dim Alpha
  • Double Tap To sleep navbar
  • Navigation Bar left/Right handed mode Switch for landscape


Instalasi :


  • Backup data data yang masih diperlukan
  • Download ROM dan GApps-nya
  • Sambil tunggu download charge baterai hingga penuh
  • Jika sudah pindah ROM dan GApps ke External Memory
  • Reboot ke TWRP
  • Mount > pilih cache, dalvik, system, data
  • Wipe > advanced wipe > pilih cache, dalvik, system, data, internal memory
  • Install > select memory > external memory (SD Card) > pilih "ResurrectionRemix-M-v5.6.9-20160605-T00F.zip"
  • Jika sudah wipe dalvik & cache
  • Install > GApps
  • Jika sudah wipe dalvik & cache
  • Wipe > format data >  yes
  • Reboot system


Jika telah dengan benar mengikuti langkah langkah diatas seharusnya device akan reboot ke system, reboot untuk pertama kali memang lumayan lama jadi harap bersabar, Untuk mengaktifkan root aktifkan developer settings > root access > Apss and ADB


Credit goes to :

XDA Senior Member tank0412
XDA Senior Member dgadelha
XDA Senior Member X AnwarMov

Link to original thread : Here


Terima Kasih~


Update 3 Juni 2016 :

Untuk sementara status ROM dialihkan menjadi "nightly build" yang artinya ROM ini akan diperbaiki setiap hari. Untuk mendapat versi yang paling baru pilih file dengan penamaan yang paling baru menurut tanggal dengan format : yyyymmdd